[home/Portal/User Manual for Institutions]
Table of Content
Account Creation
From the ListEdTech website, click on Portal Access in the header section. You will be asked to provide:
- Email Address
- First Name
- Last Name
- Password
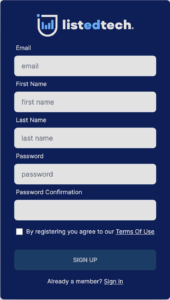
The system will also ask you to confirm your password and agree to the terms of use.
Once you click Sign Up, you will receive a confirmation email from no-reply@listedtech.com.
- Confirm your email address by clicking the link in the email.
By clicking the link, you will be redirected to the portal to finish your account setup.
- Select the organization type.
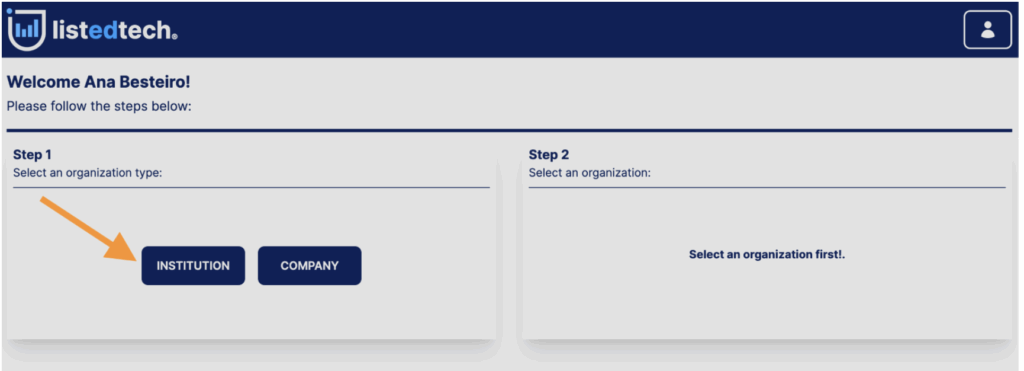
- Select your institution.
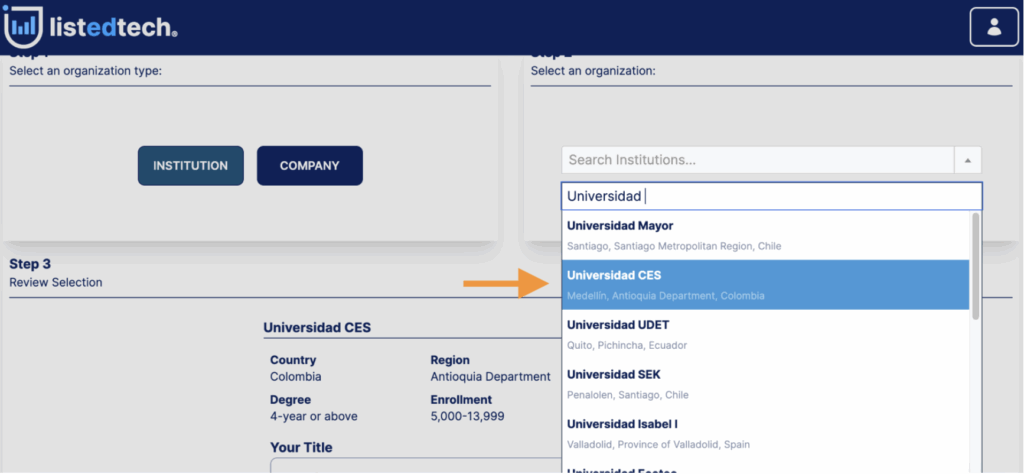
- If your institution does not exist, you may create one by clicking on Can’t find your organization? directly below the institution drop-down. Complete the form and click Submit Request.
- Add your job title and the URL that confirms that you are an employee of the institution (for example, the directory page containing your name).
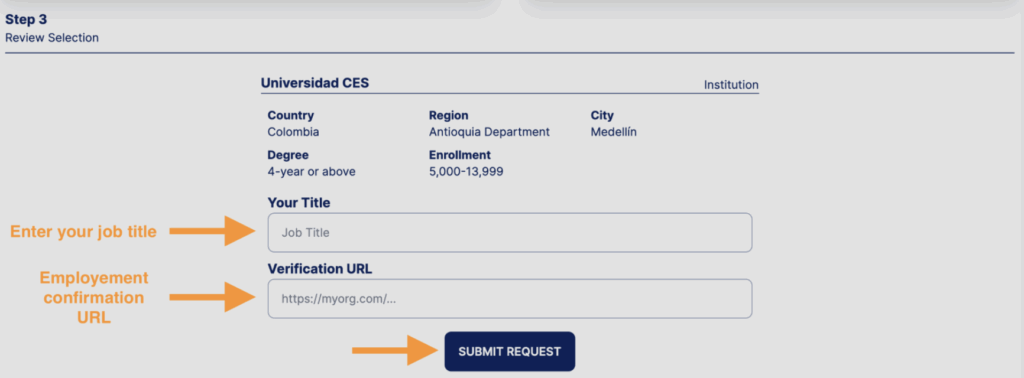
Our support team will validate your account within 24 hours, and you will obtain a free account by default.
Account Upgrade
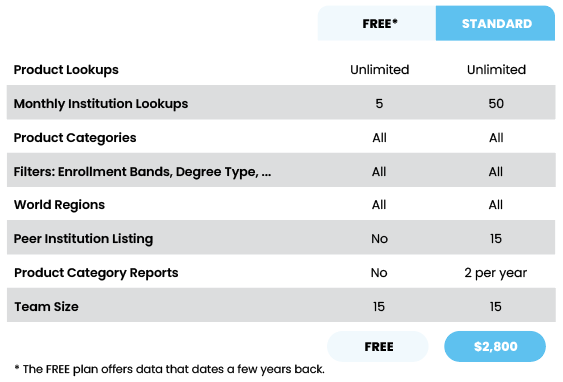
For institution users, we offer two subscription options:
How to Upgrade Your Account?
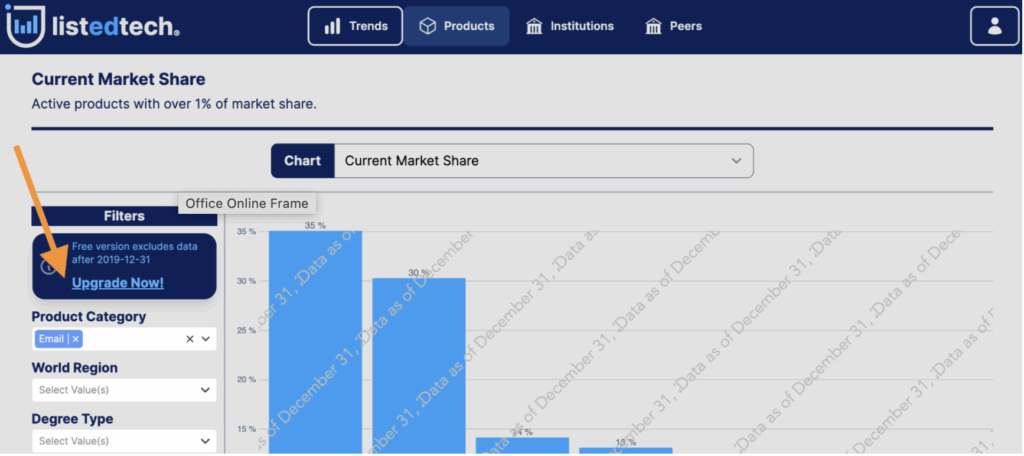
In the Filter sidebar, click Upgrade Now!
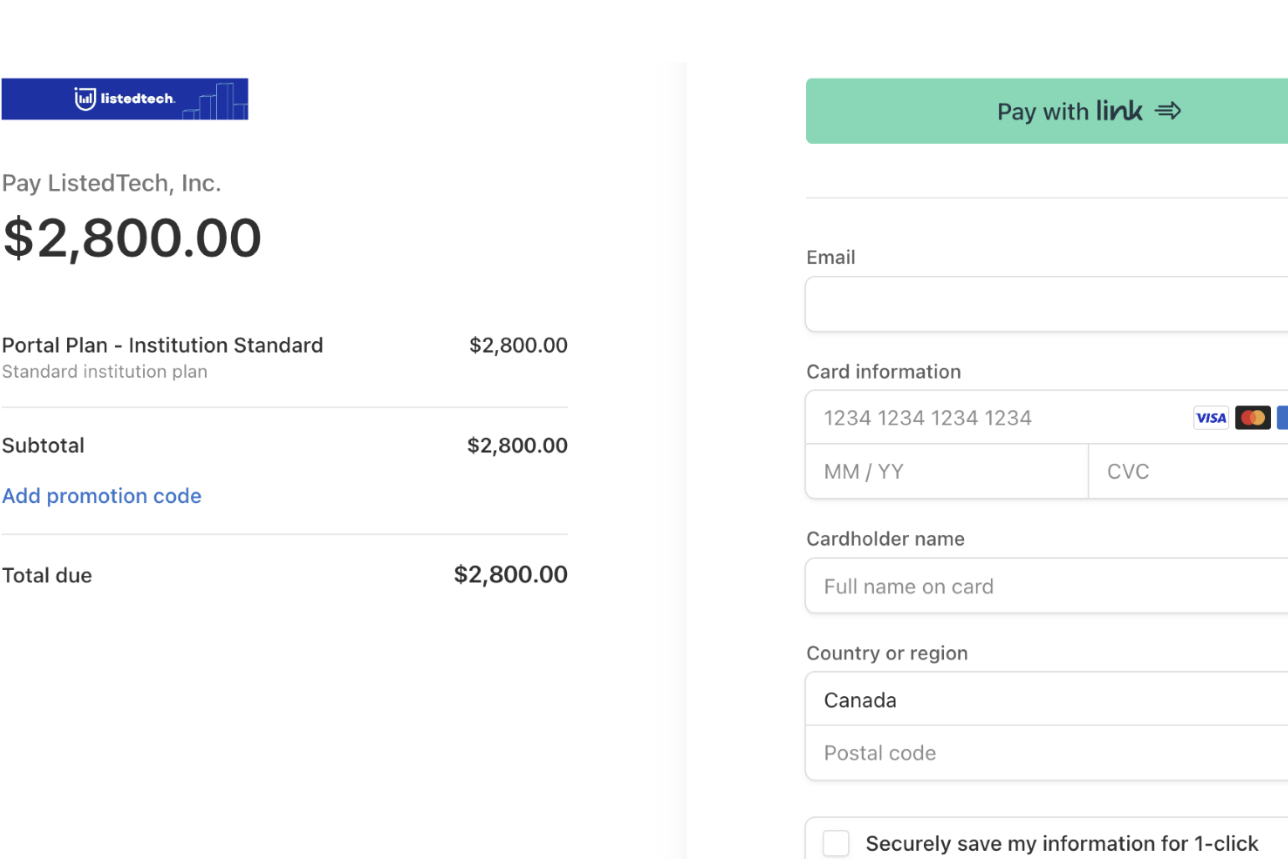
You will then be directed to a Stripe payment page where you will be asked to add your email address (please use the same address as your account creation) and provide your financial information.
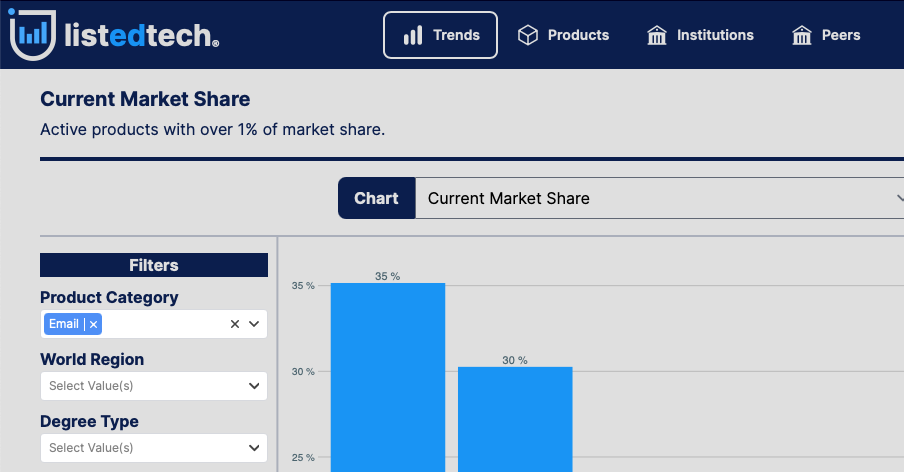
Once the process is completed you will have access to the Standard Plan.
How to Invite New Members to Your Organization?
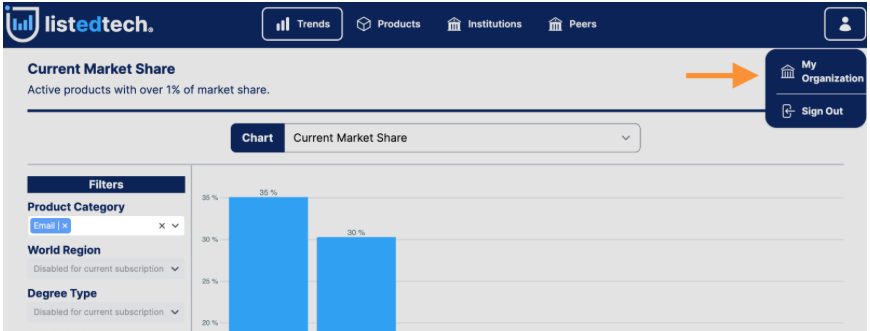
In the top right corner, click on the profile icon and on My Organization.
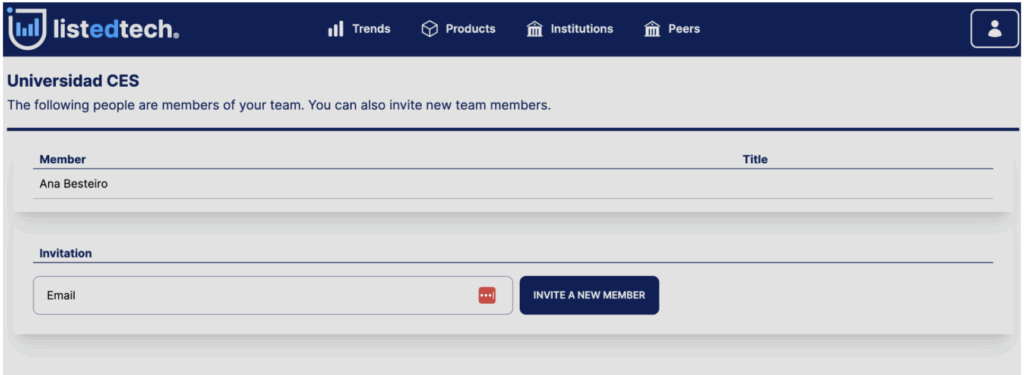
On your organization page, you will see the current users associated with your institution. To add a new member, enter their email address and click Invite a new member.
Navigation Menu
Trends
Graphs
Using the dropdown menu, you will be able to see the set of available graphs. You will be able to fine-tune the data on the graph using the available filters.
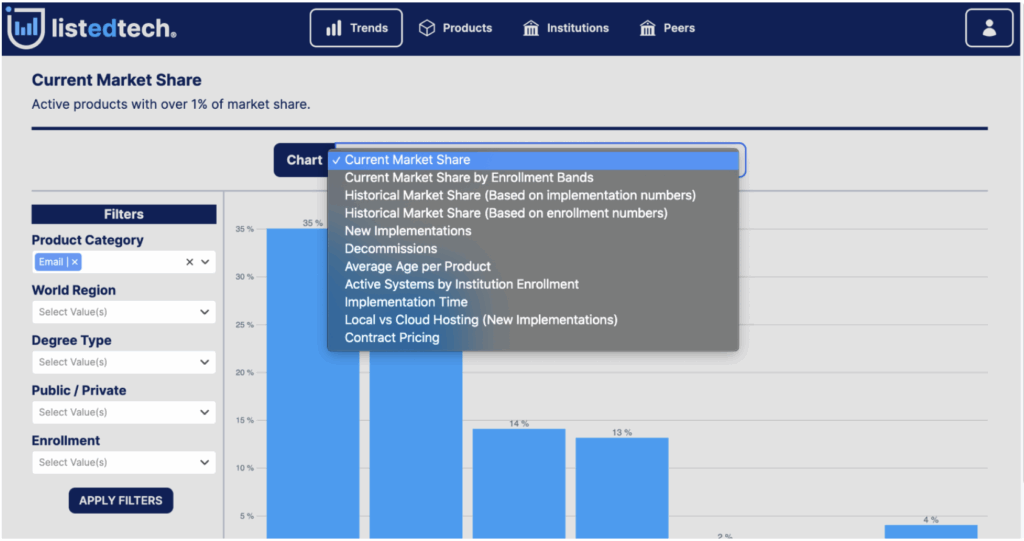
- Current Market Share
- Current Market Share by Enrollment Bands
- Historical Market Share (Based on implementation numbers)
- Historical Market Share (Based on enrollment numbers)
- New Implementations
- Decommissions
- Average Age per Product
- Implementation time
- Local vs Cloud Hosting (New Implementations)
- Contract Pricing
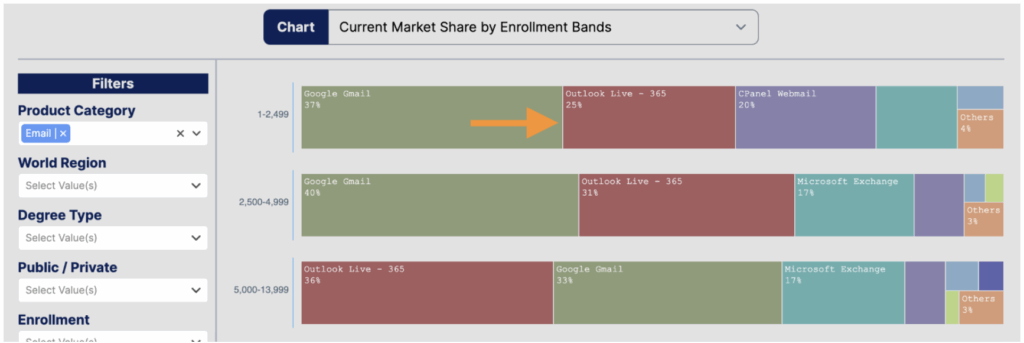
Clicking on a graph linked to a specific product (bars, histogram, legend) will open a new tab for the said product page.
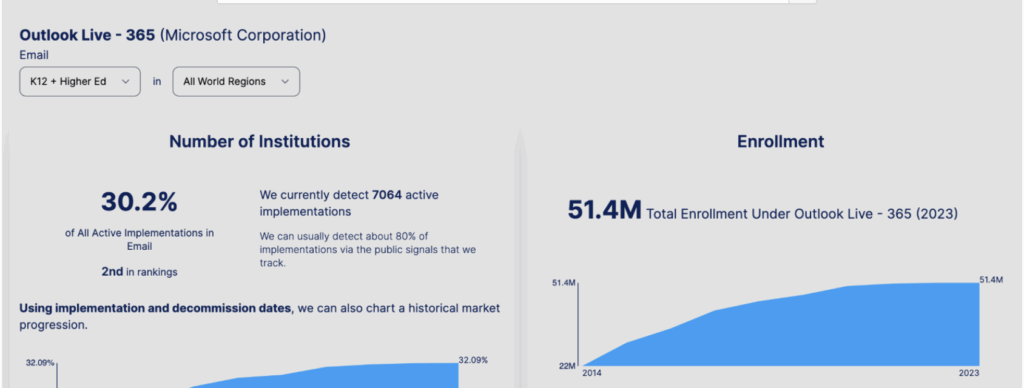
Filters
This filter sidebar allows you to select one or several filters. You may also select mutiple items for each filter (i.e. two product categories with three different degree types, etc.). If you have selected a filter by mistake, you can simply ‘x’ the said filter(s) before making the right selection.
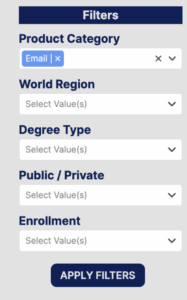
- Product Category
- All active product categories on the portal are available for selection.
- World Region
- Africa
- Asia
- Europe
- Latin America
- Middle East
- North America
- Oceania
- Degree type
- HigherEd
- 2-year
- 4-year
- Less than 2 years
- School Districts
- HigherEd
- Public/Private
- Private
- Public
- Enrollment
- 1 – 2,999
- 2,500 – 4,999
- 5,000 – 13,999
- 14,000 – 29,999
- 30,000 and over
Products
On the Products page, you can get more information about a specific product. In the Search box, enter the product name.
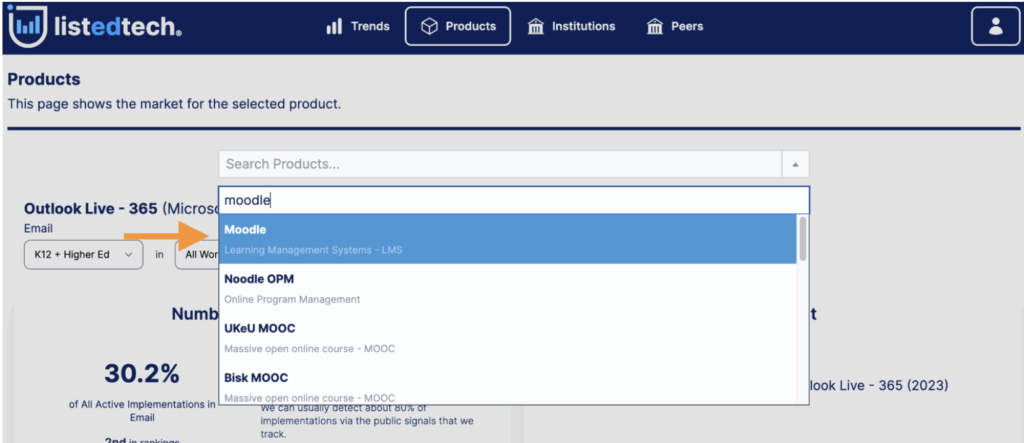
You will have access to the information on the product, like the number of institutions using the product based on active implementations and the usage according to enrollment tiers.
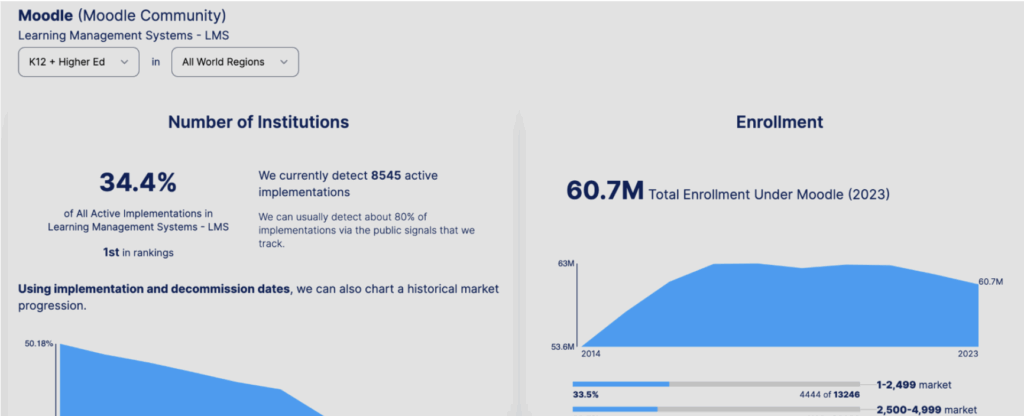
Scrolling down you will be able to see some data on competitors, showing the product replacement in the last 10 years.

The section below the data on competitors shows the list of products that are being grouped under the product you have searched.
Institutions
Similar to the Products page, the Institution page allows users to look up information about a specific institution.
Use the search field to find and select an institution.
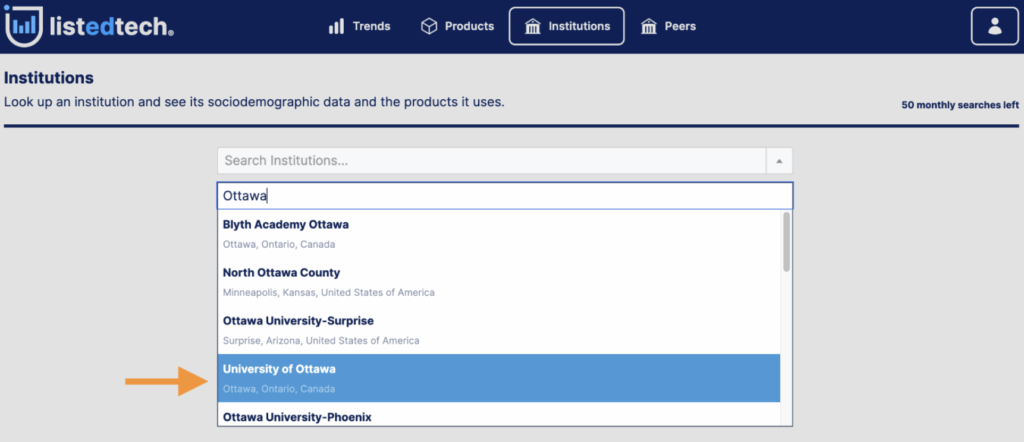
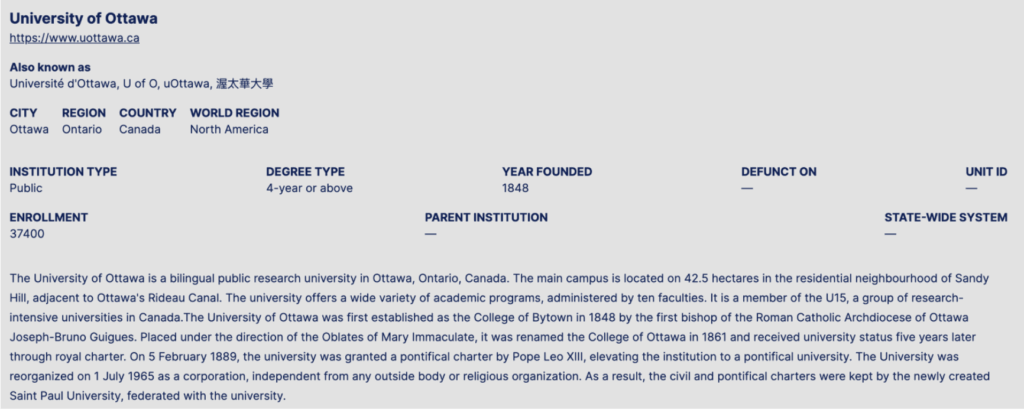
On the top of the page, you will find generic information on the selected institution.
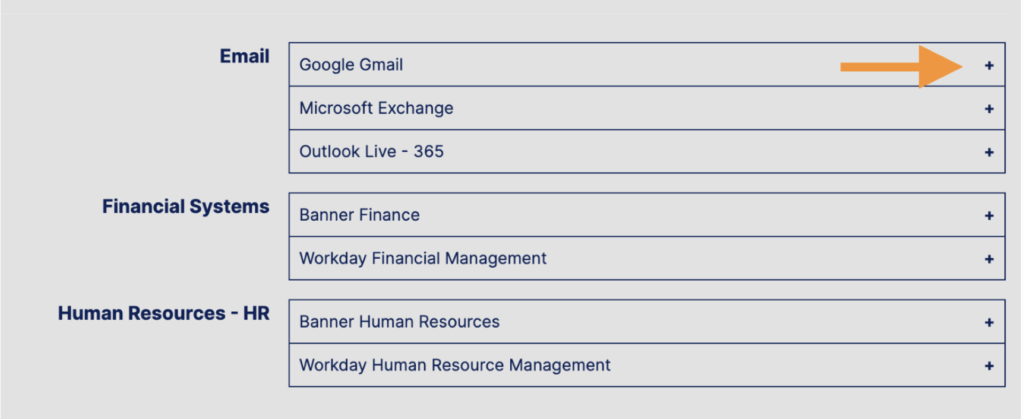
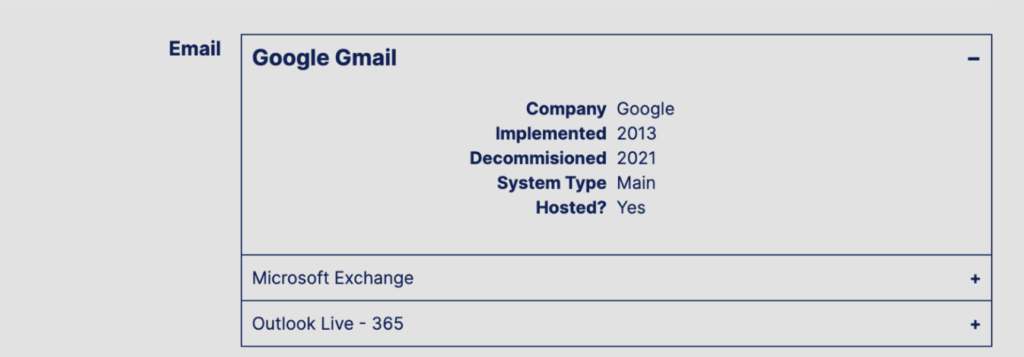
On the bottom of the page, you will find a list of products used by the selected institution. Clicking the + sign next to a product will offer details on the institution’s use of the product. Note: If you are a Free user, some products may not appear if they were implemented during the data-limited timeframe.
Peers
On the Peer page, there are two peer grouping types:
- Tech Peers: Institutions with similar technology stack. ListEdTech controls this group.
- My Managed Peers: A group of institutions your organization selects and are considered as your peers.
How to Create My Own Peer Grouping?
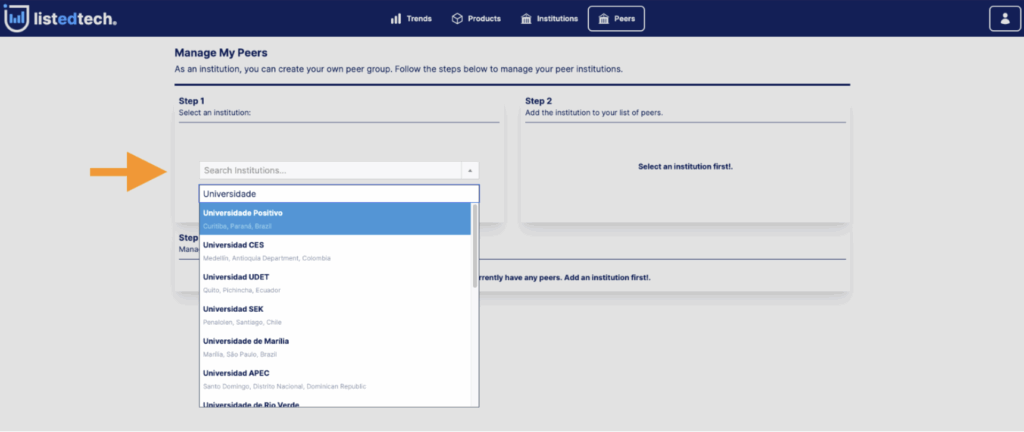
To add a new peer to your managed peers, click on the gear icon next to My Peers.

Step 1 – Select the institution.
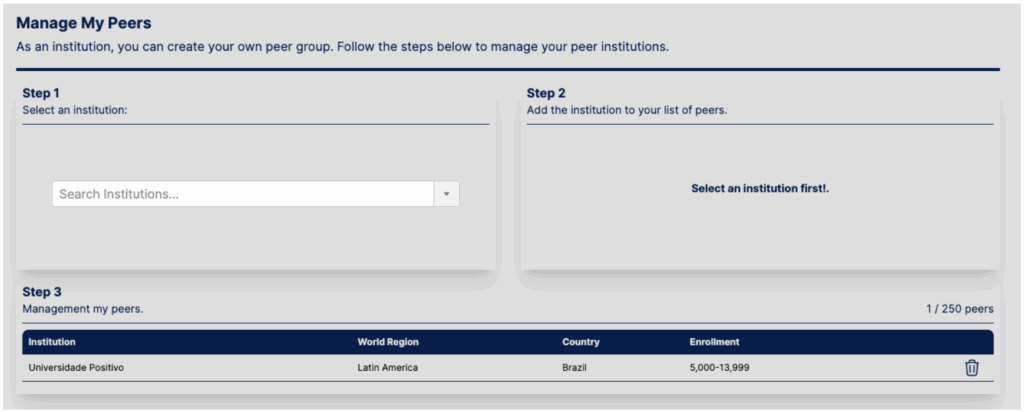
Step 2 – Confirm the institution’s details and add the selected institution.

Step 3 – The peer is added to the list. You and your colleagues can add up to 250 institutions in this peer grouping.
How to Use the What If Scenarios?
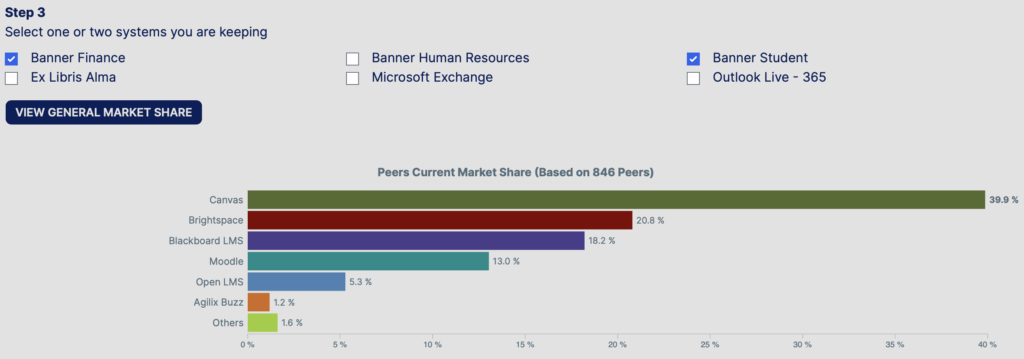
The “Explore ‘what if’ scenarios” toggle enables you to evaluate various options when considering replacing one of your systems. This tool allows you to choose specific products you want to keep, while selecting a single product category you’d like to replace. It then helps you explore what your peer institutions are using for the product category you’re looking to replace.
Step 1 – Select the Explore “what if” scenarios option from the drop-down menu.
Step 2 – Select the product category you wish to change.
Step 3 – Once you have selected the product category you wish to change, some of your institution’s products will appear. Select one or two you want to keep then click the View General Market Share button to view your results.
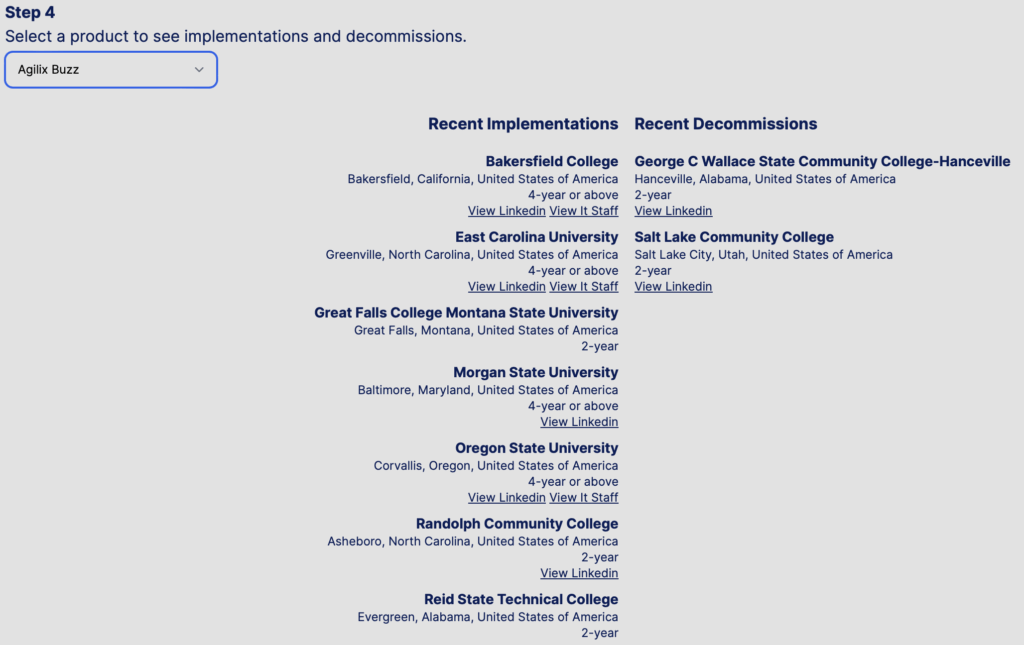
Step 4 – You may now select one of the products your peers are using to see which institutions use the product selected (Recent Implementations) and which have stopped using it recently (Recent Decommissions).
The institutions shown are based on the similarities to your institutions, e.g. location.
RFP
The RFP page allows to search for RFPs in all product categories and to download them.

To obtain a list of RFP for a specific product category, you must select the following filters:
- Product Category: this is the only mandatory selection
- Institution / State-Wide: to limit the results for institutions or state-wide systems
- Degree Type: to narrow the selection among school districts or higher education (less than two years, two years or four years and above)
- Public / Private: to limit the search among public or private institutions
- Enrollment: the same filter as the trends page
- Year: to obtain RFPs for specific years.
Once you have made your filter selection, click Apply. Search results will appear in the bottom part of the screen and will look like this image:
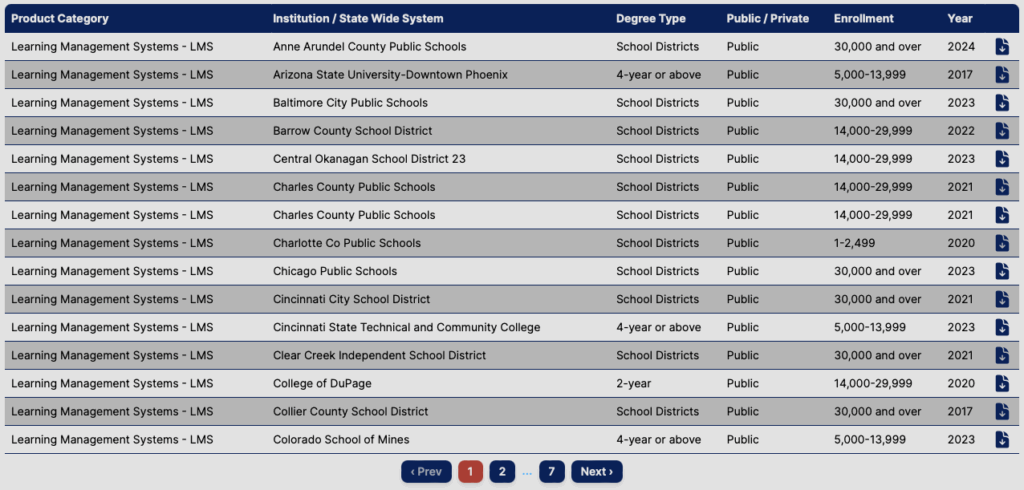
Search results are sorted by institution name. If your search returns too many results, you should add more filters.
When you find the RFP you want to download, click on the icon in the rightmost column of the table. The system will start to download the file in your Downloads folder.
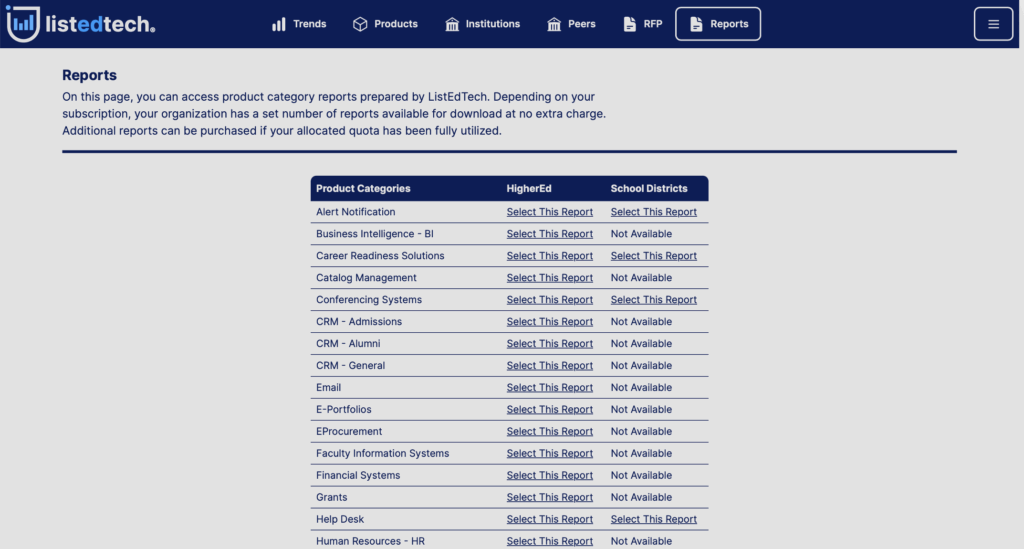
Reports
With one of the paid subscription plans, you obtain a certain number of reports you can download.
- Basic plan: 2 reports per year
- Premium plan: all available reports
Should you wish to buy additional reports, they are available for a price of $800 per report if you have an active subscription for the data portal.
My Profile Icon
This icon allows you to visit My Organization page and to log out from the portal.